Split AC Installation Guide India 2026: Costs, Copper Piping & Step-by-Step Checklist
Buying a top-rated 5-star split air conditioner is only half the battle. In fact, over 60% of cooling complaints, mysterious gas leaks, and inflated electricity bills in Indian homes stem directly from poor installation rather than machine flaws. If your technician rushes the job, kinks the copper tubing, or skips the mandatory vacuum pumping process, your shiny new machine will consume up to 30% more power while struggling to cool your bedroom in peak 45°C summer heat.
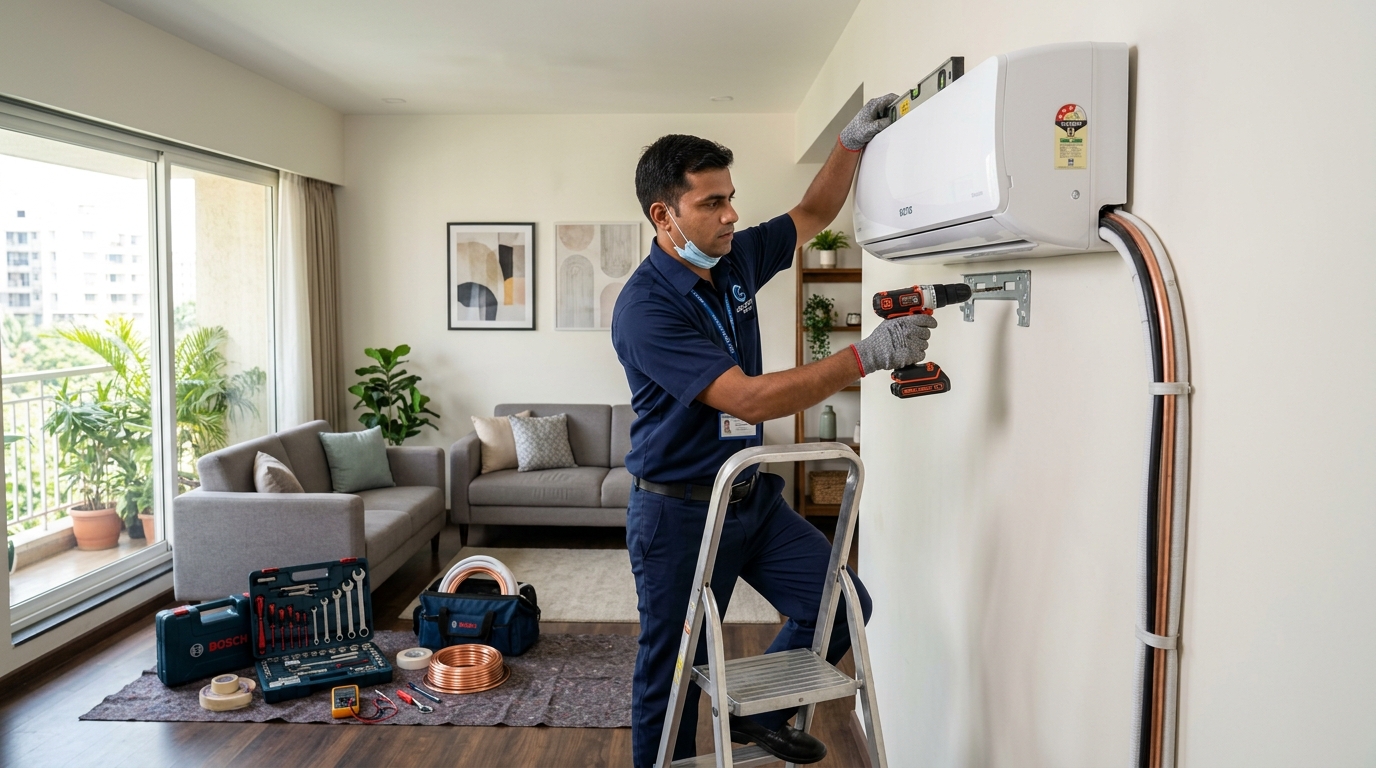
This guide walks you through every single step of the split AC installation process in India for 2026. You will learn realistic installation costs, understand the notorious "extra copper piping" charges, see exactly where to mount both indoor and outdoor units, master the electrical wiring rules, and get an on-site checklist so you can monitor your installation technician with confidence.
⚡ Quick Installation Snapshot (2026 Baseline)
Official brand rates (LG, Daikin, Voltas) for back-to-back fitting.
Includes dual copper tubes, nitrile foam insulation, and electrical cable.
Heavy-duty powder-coated iron angle stand with vibration dampers.
Standard vs. Back-to-Back vs. Complex Installation
Before scheduling an installation slot, you need to understand the physical layout of your room. AC brands and third-party platforms (like Urban Company) price their jobs based on the distance between the indoor unit (IDU) and the outdoor unit (ODU).
1. Back-to-Back (B2B) Installation
This is the cleanest, cheapest, and most energy-efficient setup. The indoor unit hangs on an external wall, and the outdoor unit sits directly on the other side of that same wall (either on an exterior balcony slab or mounted on brackets on the outer brickwork).
- Piping run: Typically 1.5 to 3 meters (fits within the free kit included in the box).
- Efficiency: Maximum cooling efficiency with virtually zero refrigerant pressure drop.
- Average labor time: 60 to 90 minutes.
- Typical out-of-pocket extra cost: ₹700 to ₹1,500 (bracket + basic core cut).
2. Standard Extended Run
Common in modern Indian apartments where local building societies forbid hanging outdoor compressor units on facade walls. The indoor unit sits on an interior bedroom wall, and the copper pipes route through a hallway, false ceiling, or balcony ledge 5 to 10 meters away.
- Piping run: 4 to 12 meters total.
- Added materials needed: Additional copper tubing, extra drainage pipe, extended interconnecting communication cable, and plastic surface casing/capping (duct).
- Typical out-of-pocket extra cost: ₹3,500 to ₹7,000 above base installation.
3. Complex Multi-Floor / Shaft Installation
Required when your bedroom has no accessible exterior wall or balcony, forcing the piping to climb to the building terrace or down into a narrow internal service shaft.
- Vertical lift: Requires checking the manufacturer's maximum allowable elevation lift (usually 10 to 15 meters for 1.5 Ton units). If the outdoor unit sits higher than the indoor unit by more than 5 meters, an oil trap bend must be installed to prevent compressor oil starvation.
- Safety & Scaffolding: Technician hazard charges or exterior rope-access fees (₹800 to ₹1,500) apply if working on tall high-rise building facades.
- Typical out-of-pocket extra cost: ₹6,000 to ₹11,000+.
What Comes in the Box vs. Paid Extra Charges
First-time buyers are frequently shocked when an installer turns up for a "₹1,200 standard installation" and hands them a final invoice of ₹4,800. Understanding what brand boxes contain will keep you from being overcharged.
| Component / Service | Included in the AC Box? | Official Brand Price (2026) | Local Market Rate |
|---|---|---|---|
| Indoor Unit Mounting Plate | Yes (Pre-attached) | ₹0 | ₹0 |
| Copper Tubing (Liquid + Gas pair) | Yes (2.5m to 3.0m in most brands) | ₹0 for first 3m | ₹0 for first 3m |
| Additional Copper Pipe Run | No | ₹850 – ₹1,200 / meter | ₹650 – ₹850 / meter |
| Outdoor Wall Stand / L-Bracket | No (Almost never included) | ₹750 – ₹950 | ₹500 – ₹700 |
| Standard Brick Wall Hole (Core cut) | 1 Hole included in labor | Included in standard charge | Included |
| RCC Concrete Core Cutting (Machine) | No | ₹1,000 – ₹1,800 / hole | ₹800 – ₹1,200 |
| Interconnecting Electrical Cable (IDU to ODU) | Yes (Matches copper pipe length) | ₹110 – ₹160 / meter (extra) | ₹80 – ₹120 / meter |
| 16A Power Plug Top | No (Bare cable wire provided) | ₹150 – ₹250 | ₹80 – ₹120 (Anchor/Havells) |
| Extra Drain Pipe (PVC flexible / rigid) | Only 1.5m to 2m flexible pipe | ₹80 – ₹120 / meter | ₹40 – ₹60 / meter |
| PVC Casing / Capping Duct (Covering pipes) | No | ₹200 – ₹300 / meter | ₹120 – ₹180 / meter |
| Vacuum Evacuation of System | Mandatory part of labor | Included (DO NOT pay extra) | Included in labor |
Pro-tip: When your AC arrives from Amazon or Flipkart, open the cardboard box alongside the delivery crew or technician. Verify that the copper pipe coil, remote controller, user manual, and indoor mounting plate are intact. Some budget brands like to supply copper pipes with aluminum connector ends or thinner wall gauges; leading brands like LG, Daikin, and Panasonic supply 100% pure copper tube kits in the box.
Realistic Installation Cost Breakdown (2026 Price List)
To budget realistically, let's look at two typical scenarios for a standard 1.5 Ton Split AC installed in an urban Indian home (such as Delhi NCR, Mumbai, Bengaluru, Pune, or Hyderabad).
Scenario A: Basic Back-to-Back Fitting
Indoor unit mounted on exterior wall; ODU on balcony or outer bracket.
- Standard Brand Labor Charge:₹1,199
- GST on Labor (18%):₹216
- Powder-Coated Outdoor Bracket:₹750
- 16A Molded Power Plug:₹150
- Anti-Vibration Rubber Bushing Pads:₹150
- Extra Copper Pipe (None needed < 3m):₹0
- Total Realistic Out-of-Pocket:₹2,465
Scenario B: Extended Run (Apartment Balcony)
Indoor unit on bedroom wall; ODU on utility balcony 7 meters away.
- Standard Brand Labor Charge + GST:₹1,415
- Extra Copper Run (4m beyond 3m free @ ₹950/m):₹3,800
- Outdoor Bracket Set:₹800
- Extra Rigid PVC Drain Pipe (4m @ ₹80/m):₹320
- PVC Capping Trunking (4m @ ₹200/m):₹800
- 16A Plug + Fasteners:₹250
- Total Realistic Out-of-Pocket:₹7,385
Where to Place the Indoor Unit: Essential Engineering Rules
Don't let the technician slap the indoor unit wherever it's easiest for them to drill. Indoor unit placement dictates room air circulation, cooling speed, energy efficiency, and how comfortable you feel while sleeping.
1. Height from the Floor (7 to 8 Feet)
For a standard Indian ceiling height of 9.5 to 10 feet, the bottom of the indoor unit should be mounted 7.0 to 8.0 feet (2.1 to 2.4 meters) above the finished floor level.
- Too low (under 6.5 ft): The cold air discharges right onto people sitting or sleeping, causing cold drafts, stiff necks, and uneven temperature gradients across the room.
- Too high (tucked against ceiling): Cold air struggles to reach the living zone, and warm air pooling near the ceiling isn't drawn effectively through the top intake grille.
2. Distance from the Ceiling (Minimum 15 to 20 cm)
Split AC indoor units pull warm room air from the top and discharge chilled air through the bottom louvers. You must leave at least 15 cm (6 inches), ideally 20 cm of unobstructed clear space between the top of the AC and your ceiling or false ceiling. If the unit is choked against the ceiling, the blower fan starves for air, static pressure rises, noise jumps dramatically, and cooling drops by 15% to 20%.
3. Side Wall Clearances (Minimum 15 cm)
Leave at least 15 cm on both the left and right sides of the indoor unit. Technicians need side access to reach the flare nut connections, electrical terminal box, and thermistor sensor clips during regular servicing or deep jet-cleaning.
4. Wall Strength & Alignment
Mount the indoor unit on a solid brick, stone, or RCC wall. If your home has gypsum board partitions, false walls, or hollow aerated concrete blocks (AAC), ensure the installer uses heavy-duty butterfly wall toggles or bolts directly into the underlying metal frame studs. A shaking indoor unit generates annoying harmonic rattles and can strain flared copper connections, leading to refrigerant gas leaks.
⚠️ The Water Drain Tilt Myth
You will often hear old-school technicians suggest: "Bhaiya, let's tilt the indoor unit slightly to the right so water drains out faster." Do not allow this. Modern split ACs have internal water collection trays engineered with built-in drainage slope gradients. The external chassis must be mounted 100% horizontally level using a spirit level (bubble level). A visibly tilted indoor unit causes uneven wear on the cross-flow blower bearings, resulting in irritating squeaks within 6 to 12 months.
Locations to Strictly Avoid for the Indoor Unit:
- Directly above electrical appliances: Never mount the AC right above your 4K TV, home theater setup, or computer desk. If the condensate drain pipe chokes with dust during humid monsoon months, water will drip straight into your expensive electronics.
- Directly facing windows or doors: Positioning the blower directly opposite frequently opened bedroom doors pushes conditioned air straight out of the room.
- Directly above your headboard: Having chilled air blast directly onto your face all night dries your nasal passages, triggers morning sinus headaches, and creates discomfort. Offset the unit so air circulates over the foot of the bed or along the room length.
Outdoor Unit (ODU) Placement: Protecting Your Compressor
The outdoor unit houses the heart of your cooling system: the inverter compressor, the condenser coil, and the condenser fan motor. In Indian summers, outdoor temperatures routinely cross 42°C to 47°C. If your outdoor unit cannot exhaust heat freely, it will suffer from high-head-pressure tripping, drastically reduced ISEER efficiency, and early compressor failure.
| Clearance Dimension | Minimum Required | Ideal Recommendation | Why It Matters |
|---|---|---|---|
| Rear Clearance (Wall to Coil) | 15 cm (6 inches) | 30 cm (12 inches) | Allows ambient air intake across the condenser fins without restriction. |
| Front Clearance (Exhaust Fan) | 60 cm (24 inches) | 100 cm (40 inches) | Prevents hot blast air from bouncing off opposite walls back into the unit. |
| Service Valve Side (Right side) | 30 cm (12 inches) | 45 cm (18 inches) | Technician needs room to attach manifold gauges, vacuum pump, and torque wrenches. |
| Top Clearance | 30 cm (12 inches) | 50 cm (20 inches) | Ensures hot rising air can escape without creating a heat cushion. |
Key ODU Installation Guidelines:
- Avoid the Balcony Heat Trap: In modern high-rise societies, developers often relegate outdoor units to tiny recessed utility balconies with louvered metal grilles. If hot air expelled from the fan hits a solid wall or tight louvers, it recirculates back into the condenser coil. When outdoor ambient temperatures are 42°C, recirculation can push local coil intake temperatures above 52°C, causing your inverter compressor to throttle down its speed or shut off completely with an error code (such as LG CH-05 / Daikin E6/L5).
- Provide Shade from West-Facing Sun: If the unit must face west or south where blazing afternoon sunlight beats on it directly, install an overhead metal or fiber shade awning at least 50 cm above the unit. Shading the outdoor unit can improve overall cooling speed and reduce power usage by 5% to 10% during peak 2 PM to 5 PM heat.
- Fit Anti-Vibration Rubber Dampers (AV Pads): Never bolt the metal base feet of the outdoor unit directly onto an iron wall bracket or concrete slab without rubber isolating pads. Inverter compressors run at variable frequencies; at certain RPMs, metal-on-metal contact creates low-frequency acoustic vibrations that resonate through brick walls and turn your bedroom wall into a giant speaker. High-grade rubber pads cost just ₹100 to ₹200 and keep your bedroom library-silent.
- Condensate Drain Management for ODUs: When running in winter heating mode (if you purchase a hot & cold heat pump AC), or under extreme coastal humidity, the outdoor unit also discharges condensed water from the bottom drain port. Ensure the drain nipple and hose route water safely to a balcony drain rather than letting it drip onto your downstairs neighbor's balcony.
Copper Piping: Lengths, Insulation & Brazing Standards
The copper piping harness is the circulatory system of your air conditioner. It transports high-pressure liquid and low-pressure suction gas between the two units. Substandard piping or shoddy flaring is the #1 cause of catastrophic gas loss in India.
Minimum vs. Maximum Copper Piping Length
- Minimum Pipe Length (3 Meters): Even if your indoor and outdoor units sit back-to-back sharing a 9-inch brick wall, you must not cut the copper pipe down to 1 meter. Air conditioners require a minimum piping loop length of 3.0 meters (10 feet) to absorb compressor vibration pulses and prevent refrigerant cavitation noise from entering the indoor evaporator. If the units are only 0.5 meters apart, the technician must neatly coil the excess 2 meters behind the outdoor unit horizontally.
- Maximum Pipe Length without Gas Top-Up: Most 1.0 Ton and 1.5 Ton ACs from brands like LG, Daikin, Voltas, and Carrier are pre-charged with refrigerant at the factory for up to 7.5 meters (25 feet) of piping run.
- Extended Lengths (15 to 30 Meters): If your total piping run exceeds 7.5 meters, the technician must inject additional refrigerant gas (typically 15 to 20 grams of R32 per extra meter of pipe) using a precision digital scale. If they run 15 meters of pipe without topping up the gas, the AC will starve, suction pressure will drop, and the indoor coil will frost over with ice.
Copper Tube Wall Thickness (Gauge 22 vs. Gauge 24)
Never compromise on copper gauge. Modern split air conditioners run on R32 or R410A refrigerants, which operate at tremendous operating pressures (up to 380 to 450 PSI on hot summer afternoons).
The mandatory standard for high-pressure R32 inverter systems. Resists cracking during pipe bending, withstands intense vibration, and provides decades of corrosion resistance. Always demand 22-gauge tubes (branded Mandev, Mexflow, or Totaline).
Cheaper substandard pipe pushed by unauthorized local contractors to pocket higher profit margins. Fails flaring tests, wrinkles easily around 90-degree corners, and frequently develops micro-pinhole leaks within 2 to 3 years.
Independent Nitrile Foam Insulation
Both copper tubes—the thinner liquid line and the thicker suction line—must be sleeved with individual black elastomeric nitrile rubber foam tubing (minimum 9mm or 13mm wall thickness).
Warning: Beware of lazy installers who slip both copper pipes into a single wide insulation sleeve to save 10 minutes. When both pipes touch inside the same sleeve, heat transfers between the cold suction gas and the warm liquid line, killing thermodynamic efficiency and causing severe sweating (condensation) that rots through your interior drywall or plaster ceiling.
Once properly sleeved, the copper lines, drain pipe, and 4-core communication cable should be bound tightly together using heavy-duty vinyl wrap tape (cross-wrapped) to protect the insulation against UV breakdown from sunlight and bird pecking.
The Golden Rule: Mandatory Vacuum Pumping (The Step 90% of Technicians Skip)
If you take away just one piece of advice from this guide, let it be this: Never allow an installer to turn on your split AC without connecting a motorized vacuum pump first.
Why Vacuuming is Non-Negotiable
When the copper lines are connected between the indoor and outdoor units, the copper pipes are filled with regular atmospheric room air. That air contains two lethal enemies of air conditioning: nitrogen/oxygen (non-condensable gases) and humidity (moisture vapor).
- Moisture + Synthetic POE Oil = Hydrofluoric Acid: Inverter compressors use synthetic Polyolester (POE) lubricating oil. POE oil is extremely hygroscopic (it drinks moisture from air instantly). When moisture mixes with POE oil and R32 refrigerant at high discharge temperatures, it hydrolyzes into harsh acids, eats through the enamel insulation on compressor motor windings, causes copper plating, and fries the compressor.
- High Head Pressure & Ineffective Cooling: Air cannot condense. It sits trapped inside the top of the condenser coil, raising discharge head pressure by 15% to 25%. This causes your inverter compressor to draw extra current, overheat, and cycle off on thermal overload.
The Dishonest Shortcut: "Purging" or "Flushing"
Because running a two-stage vacuum pump takes 15 to 20 minutes, technicians during the sweltering April–June rush will often try to deceive homeowners. They will crack open the liquid valve slightly and release a blast of raw R32 refrigerant through the suction service port into the atmosphere, claiming: "Sir, we have flushed out the air! This is normal."
This is malpractice. Purging does not remove trapped moisture clinging to inner copper walls, releases toxic ozone-damaging greenhouse gas into the atmosphere, and robs your factory charge of 10% to 15% of its original refrigerant before you have even turned the machine on for the first time.
What to Demand from Your Technician:
- Ensure they carry a functional motorized vacuum pump (either single-stage or two-stage rotary pump) and a manifold gauge set.
- The vacuum pump must be connected to the service charging port on the outdoor unit suction valve with the hex service valves firmly closed.
- Run the vacuum pump for a minimum of 15 to 20 minutes until the compound gauge pulls down to -30 inHg (-76 cmHg) or below 500 microns on a digital micron gauge.
- Turn off the pump and leave the manifold gauge valves shut for 5 minutes. The needle must stay completely still. If the gauge rises toward zero, there is a physical flaring leak in the copper joints that must be tightened before releasing the refrigerant!
Electrical Requirements: Dedicated MCB, Wiring & Earthing
Modern inverter air conditioners are sophisticated electronic devices packed with microcontrollers, insulated gate bipolar transistors (IGBTs), switch-mode power supplies (SMPS), and noise filter reactors. Powering an AC using shoddy wiring or daisy-chaining it to a standard room socket is an invitation to PCB burnouts and fire hazards.
| AC Tonnage | Running Current (Amps) | Dedicated MCB Rating | Copper Wire Gauge (Phase/Neutral) | Plug & Socket Type |
|---|---|---|---|---|
| 0.8 Ton to 1.0 Ton | 3.5A – 5.5A | 10A – 16A C-Curve | 2.5 sq mm multi-strand copper | 16A 3-pin round socket |
| 1.5 Ton Split AC | 5.5A – 8.5A | 16A C-Curve | 2.5 sq mm or 4.0 sq mm | 16A / 20A industrial socket / DP switch |
| 2.0 Ton Split AC | 8.0A – 12.5A | 20A – 25A C-Curve | 4.0 sq mm multi-strand copper | 25A Heavy-Duty DP Switch / Enclosure |
Three Critical Electrical Rules for Indian Homes:
- Dedicated MCB from Main Distribution Box: Never connect your split AC into an ordinary 5A/15A socket that shares a circuit with geysers, refrigerators, or microwave ovens. Run a continuous, dedicated 2.5 sq mm copper wire directly from a C-curve MCB in your home's main electrical distribution board. C-curve MCBs are engineered specifically to tolerate the brief motor startup current inrush without nuisance tripping.
- Rock-Solid Earthing (Grounding): Inverter AC outdoor units produce high-frequency switching noise on their DC bus capacitors. Without robust electrical grounding (earth-to-neutral voltage strictly below 3.0 Volts AC), floating static voltages build up on the metal chassis. This static charge can punch microscopic holes through delicate gate-insulator layers on the outdoor PCB, causing sudden failure during humid storms.
- Indoor vs. Outdoor Power Supply Feeds: Check where your specific model receives its main power supply. For example, older models took 230V mains power into the indoor unit, while many modern inverter ACs (such as Daikin and select LG models) require the primary 230V mains line to connect directly to the outdoor unit terminal strip first, with a secondary communication cable running back to the indoor unit. Clarify this with your electrician before running conduit concealed in plaster.
Do You Really Need an External Voltage Stabilizer in 2026?
Every major brand proudly advertises "Stabilizer-Free Operation" with wide operating ranges like 120V to 290V or 145V to 285V. So why do technicians and retail showrooms still push you to buy a ₹2,500 stabilizer?
Here is the unvarnished reality: Stabilizer-free operation protects the AC by shutting it down safely when voltage goes out of bounds, but it does NOT regulate voltage while operating.
🟢 You DON'T Need a Stabilizer If:
- You live in an urban metro area (South Delhi, Mumbai suburban, Bengaluru core, Pune, Hyderabad tech corridors).
- Your society has a dedicated captive transformer with stable grid power.
- Voltage at your socket measures consistently between 210V and 240V throughout hot summer afternoons.
- You have full DG generator backup with automated changeover.
🟡 You MUST Buy a Stabilizer If:
- You live in Tier-2/Tier-3 cities, rural suburbs, or independent houses with frequent low-voltage drops (<170V).
- Your lights noticeably dim or flicker when neighbors power on irrigation pumps or heavy machinery.
- You live in areas prone to neutral disconnection or overhead lightning power surges.
- An outdoor inverter PCB replacement costs ₹6,000 to ₹10,000 out of warranty; a good stabilizer like the V-Guard VG 400 or Microtek EM4160+ acts as a cheap ₹2,400 insurance shield.
Step-by-Step Split AC Installation Process
Here is what a professional, textbook installation looks like from start to finish. Use this chronological breakdown to supervise the technicians on installation day.
Wall Marking & Mounting Bracket Leveling
The technician holds the galvanized steel indoor mounting plate against the wall, checks clearance from the ceiling (15+ cm) and side walls, and uses a magnetic spirit level to mark pilot holes. Using an impact hammer drill with 6mm or 8mm masonry bits, they insert heavy-duty PVC wall grip plugs and screw the bracket down using at least 5 to 6 screws so the plate cannot wiggle under load.
Drilling the 3-Inch Core Hole with Downward Slope
A 65mm to 75mm (2.5 to 3 inch) circular hole is drilled through the external wall for the piping harness. Critical check: The hole must slope downward toward the exterior at a 5-to-10-degree gradient. If the hole is drilled flat or slopes upward, condensate drain water will back up into the indoor drip tray and pour down your bedroom interior wall.
Pre-Assembling the Piping Bundle & Mounting IDU
The technician uncoils the copper lines, feeds each line through individual nitrile insulation tubes, positions the flexible drain hose at the bottom of the bundle (below the copper pipes), adds the 4-core electrical cable, and secures the bundle with non-adhesive vinyl tape. The bundle is fed gently through the wall sleeve, and the indoor unit is clicked securely onto the mounting plate top hooks and locked onto the bottom clips.
Outdoor Bracket Mounting & Positioning
Using heavy-duty steel anchor rawlbolts (minimum 10mm or 12mm thickness), the technician fixes the outdoor cantilever L-brackets to the exterior wall or sets the unit on a firm level balcony pad. They verify the bracket alignment with a spirit level, bolt down the outdoor unit feet with anti-vibration rubber pads, and check for adequate rear and front air clearance.
Pipe Bending, Flaring & Torque Wrench Tightening
Copper lines are bent gently using an external spring bender or lever mandrel to prevent kinks or oval deformation. The technician cuts the tube with a sharp rotary pipe cutter, deburrs the inner edge using a reamer (pointing down so copper shavings do not enter the tube), slides the brass flare nut on, and creates a symmetrical 45-degree flare using an eccentric flaring tool. The flare nuts are tightened using two wrenches (one backup wrench on the valve body) and torqued to manufacturer specifications.
Vacuum Evacuation & Leak Holding Test
The technician attaches the charging manifold hose to the suction valve port, starts their electric vacuum pump, and evacuates the line to -30 inHg for 15 to 20 minutes. They close the manifold valve, turn off the pump, and monitor the gauge for 5 minutes to confirm there is zero vacuum loss.
Releasing Refrigerant & Soapy Bubble Leak Test
Using an Allen hex key, the technician opens the liquid service valve first, then the suction service valve, releasing the factory-charged R32 gas into the indoor coil and piping harness. They apply liquid soap solution or commercial bubble leak detector over both the indoor and outdoor flare joints to check for bubbling micro-leaks.
Commissioning & Temperature Delta-T Test
The power cord is connected, MCB switched on, and the AC is turned on in Cool Mode at 18°C on high fan speed. After 15 minutes of stable compressor run time, the technician measures the return air temperature (top intake) and the supply air temperature (bottom louvers) using a digital probe thermometer. The difference (Delta-T) should be between 8°C and 14°C, confirming healthy heat transfer. Finally, they pour 500ml of clean water into the indoor drain tray to verify continuous flow out the exterior drain hose.
Preparing for AC Installation?
Avoid paying inflated 200% markups to technicians on site. Get verified 100% pure copper piping kits, heavy-duty outdoor brackets, rubber vibration isolators, and 4-core cables delivered directly to your doorstep.
7 Costly Installation Mistakes That Kill Cooling & Double Bills
Keep a hawk-like eye out for these seven common technician shortcuts during installation. Each one carries serious performance and longevity penalties:
- Skipping Vacuum Pumping: As explained earlier, this single shortcut cuts heat-exchange capacity by 20% to 30%, degrades compressor oil into hydrofluoric acid, and drives your monthly electricity bills through the roof.
- Kinking the Copper Lines Around Balcony Beams: Installers eager to save 5 minutes will bend copper pipes around sharp 90-degree concrete corners using their bare thumbs instead of an external spring bender. This crushes the pipe into an oval or creates an internal pinch point, restricting refrigerant mass flow and starving the evaporator coil.
- Placing the Drain Pipe Above the IDU Tray Level: If any portion of the flexible exterior drain pipe sags or loops upward, an airlock forms. Water backs up into the indoor unit, overflowing onto your bedroom wall, ruining fresh paint, and staining wallpaper.
- Over-Torquing Flare Brass Nuts: Without a calibrated torque wrench, overzealous technicians using oversized pipe wrenches frequently over-tighten the soft copper flare against the brass valve cone. This thins out the copper lip until it micro-fractures, releasing 100% of your R32 refrigerant over the next 2 to 4 weeks.
- Mounting the Outdoor Unit Facing a Solid Wall Without Space: Trapping an outdoor compressor unit in a narrow 1.5-foot gap between high terrace boundary walls causes severe hot-air recirculation. Your inverter AC will run at peak 100% capacity continuously yet blow lukewarm air inside because the condenser cannot dump heat.
- Using Cheap 2-Core or Undersized Wiring: Modern inverter split ACs require 4-core interconnecting wiring (Phase, Neutral, Ground Earth, and Serial Digital Communication Line). Using flimsy 1.0 sq mm local flexible wire causes communication signal drops, triggering intermittent PCB communication error codes (e.g., Daikin U4 or LG CH-05).
- Leaving Wall Holes Unsealed: After passing the piping bundle through the 3-inch wall hole, lazy installers often leave the gap wide open. This invites lizards, mice, and monsoon humidity straight into your bedroom false ceiling, while allowing precious chilled indoor air to leak outdoors. Insist that the installer seal the hole thoroughly using non-hardening white silicone sealant or expanding polyurethane foam.
On-Site AC Installation Checklist for Homeowners
Print this out or keep it open on your smartphone during installation day. Check off each box before signing the technician's job sheet:
Frequently Asked Questions (FAQs)
How much does split AC installation cost in India in 2026?▼
Is copper pipe included free with a split AC purchase?▼
Can I install a split AC myself (DIY)?▼
How much extra copper pipe cost per foot in India?▼
What is the maximum allowed copper pipe length for a 1.5 Ton split AC?▼
Why is vacuum pumping required during installation?▼
Can the outdoor unit be installed above the indoor unit?▼
What type of electrical socket is required for a 1.5 Ton split AC?▼
Do inverter ACs need an external voltage stabilizer in India?▼
Related AC Guides & Tools
Best 1.5 Ton AC in India →
Top-rated 5-star inverter models tested for severe Indian summers.
Protection GuideBest Voltage Stabilizers →
Top 4kVA & 5kVA digital stabilizers to protect sensitive inverter PCBs.
Calculator ToolAC Tonnage Calculator →
Calculate exact cooling tonnage based on room dimensions, floor, and sun exposure.
Technology Deep DiveInverter vs Non-Inverter AC →
Real electricity savings math, compressor wear, and payback analysis.
BEE StandardsWhat is ISEER Rating? →
Demystifying BEE star ratings, annual units consumed, and real efficiency.
Cost CalculatorElectricity Cost Calculator →
Estimate monthly AC running costs under state electricity board slabs.